Blessed are the pure in heart,
for they will see God.
Blessed are the peacemakers,
for they will be called sons of God.
1Blessed are those who are persecuted because of righteousness,
for theirs is the kingdom of heaven.
Wednesday, September 22, 2010
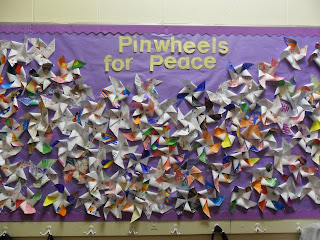
Bulletin Board: Pinwheels for Peace
So this year I decided to participate in Pinwheels for Peace. I saw a lecture about art advocacy at a FAEA conference and one of the projects they did with their kids were making pinwheels for Pinwheels for Peace on the national day of peace, September 21st. I had my students start designing their pinwheel the first day of school as an extra activity and then I had another day for the class to finish and assemble. I really love how the board turned out. Yes, yes, I know that the board is still purple. I promise to have a different color next time.


Tuesday, September 21, 2010
Bulletin Board: 1st and 2nd Grade Lines and Shapes Projects
So here is another bulletin board showcasing some 1st and 2nd grade artwork. I have to say I do love the purple and lime green (two of my favorite colors). I would love to keep the color scheme but I have to put a little variety in my bulletin board designs so that they constantly look different and unique.
For 1st grade we start the year out with a cut paper collage project. I talk about different types of shapes, repetition, overlapping and balance. We covered basic cutting techniques and using glue properly. Dot, dot, not a lot!
2nd grade - Line and Shapes design. I usually start 2nd grade drawing line and shapes with the thin Mr. Sketch Markers but I decided to change it up. I had the class start by drawing 5-6 lines that overlap. Inside each shape they are to draw a pattern using repeating lines, shapes and colors. I picked this up from another blog that did it in black and white. I think choosing to do this in color turned out really well.
Thursday, September 16, 2010
Video: Julien Beaver, 3D Street Art
I already have the sidewalk chalk festival rattling around in my brain. I really want to come up with a great picture to draw this year. Here is some inspiration. If you have not see Julien Beaver's street art before, your in for a treat!
Wednesday, September 15, 2010
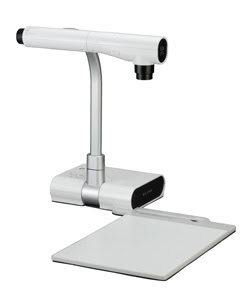
Elmo, Where Have You Been All My Life!
One of the best tools for teaching art. If you are able to talk your school into getting one of these, I highly, highly recommend it. I can tell you that if my school did not have the money for this I would buy a web came and make some kind of stand to create a make-shift document camera. It is totally worth it! I have found that the kids are more engaged, I am able to show drawing, cutting and painting techniques without dripping that everyone can see. Amazing technology!


Thursday, September 9, 2010
The Importance of Art: Bulletin Board
Here is the bulletin board that I put up at the start of the school year. I decided to put facts about how important art is to children and their development. I am taking down the tree today and thought I would post for all to see. The Klimt tree took forever to make and cut out. I always end up doing projects that make me ask myself "what was I thinking". It turned out well and I was pretty happy with it.


Wednesday, September 8, 2010
2nd Grade: Monster Collage
First, I have to give credit to Deep Space Sparkle for such a great project idea. I could not resist doing this project last year and the kids loved it. I decided to change it a up a little to make it my own. I hope you enjoy.
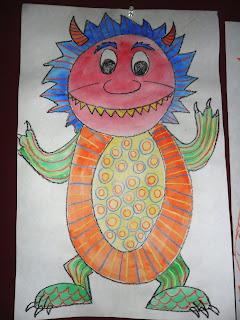
The first thing I start with is reading the book Where the Wild Things Are. The project is based on the illustrations, focusing on line, pattern and texture. When the students draw their monsters I expect them to use line, pattern and texture just like the book.
 Next, I show them how to draw the body of the monster using basic shapes. I also show them an easy way to draw arms, legs and claws. I have put a step-by-step example of how to draw a monster below. I do make sure to explain to the kids that this is about being creative and they do not have to draw their monster exactly like mine. The last step to drawing the monster is pattern and texture with lines and shapes.


Paint with water colors. I suggest bright colors to complement the crayon colors.
 Forest background. Using crayons I show the students how to draw the forest. We talk about the horizon line, the importance of overlapping, and that objects that are further back in space get smaller, object that are close are larger.

Paint with blues and greens.

Cut out the monster.

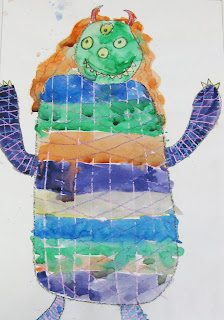
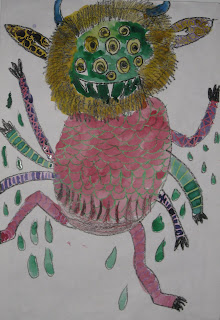
Paste to background. The kids really like this project and love drawing different kinds of monsters. Here are some examples from last year. I decided to add the background in this year.
The first thing I start with is reading the book Where the Wild Things Are. The project is based on the illustrations, focusing on line, pattern and texture. When the students draw their monsters I expect them to use line, pattern and texture just like the book.
 Next, I show them how to draw the body of the monster using basic shapes. I also show them an easy way to draw arms, legs and claws. I have put a step-by-step example of how to draw a monster below. I do make sure to explain to the kids that this is about being creative and they do not have to draw their monster exactly like mine. The last step to drawing the monster is pattern and texture with lines and shapes.
Paint with water colors. I suggest bright colors to complement the crayon colors.

Paint with blues and greens.

Cut out the monster.

Paste to background.
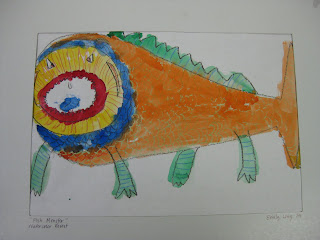
 The kids really like this project and love drawing different kinds of monsters. Here are some examples from last year. I decided to add the background in this year.
Subscribe to:
Posts (Atom)
