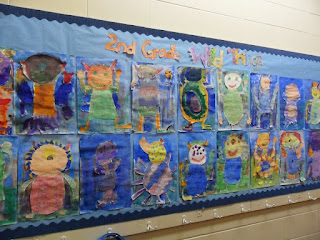
Here are some of the prints from this year’s 2nd grade print houses. I posted instructions here in a previous post. Enjoy!
Showing posts with label 2nd Grade. Show all posts
Showing posts with label 2nd Grade. Show all posts
Wednesday, May 18, 2011
Wednesday, November 3, 2010
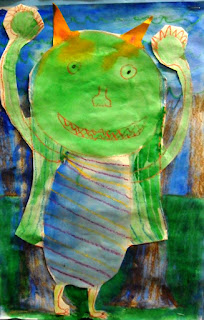
Finished 2nd Grade Monsters
Tuesday, September 21, 2010
Bulletin Board: 1st and 2nd Grade Lines and Shapes Projects
So here is another bulletin board showcasing some 1st and 2nd grade artwork. I have to say I do love the purple and lime green (two of my favorite colors). I would love to keep the color scheme but I have to put a little variety in my bulletin board designs so that they constantly look different and unique.
For 1st grade we start the year out with a cut paper collage project. I talk about different types of shapes, repetition, overlapping and balance. We covered basic cutting techniques and using glue properly. Dot, dot, not a lot!
2nd grade - Line and Shapes design. I usually start 2nd grade drawing line and shapes with the thin Mr. Sketch Markers but I decided to change it up. I had the class start by drawing 5-6 lines that overlap. Inside each shape they are to draw a pattern using repeating lines, shapes and colors. I picked this up from another blog that did it in black and white. I think choosing to do this in color turned out really well.
Wednesday, September 8, 2010
2nd Grade: Monster Collage
First, I have to give credit to Deep Space Sparkle for such a great project idea. I could not resist doing this project last year and the kids loved it. I decided to change it a up a little to make it my own. I hope you enjoy.
The first thing I start with is reading the book Where the Wild Things Are. The project is based on the illustrations, focusing on line, pattern and texture. When the students draw their monsters I expect them to use line, pattern and texture just like the book.
 Next, I show them how to draw the body of the monster using basic shapes. I also show them an easy way to draw arms, legs and claws. I have put a step-by-step example of how to draw a monster below. I do make sure to explain to the kids that this is about being creative and they do not have to draw their monster exactly like mine. The last step to drawing the monster is pattern and texture with lines and shapes.


Paint with water colors. I suggest bright colors to complement the crayon colors.

 Forest background. Using crayons I show the students how to draw the forest. We talk about the horizon line, the importance of overlapping, and that objects that are further back in space get smaller, object that are close are larger.

Paint with blues and greens.

Cut out the monster.

Paste to background. The kids really like this project and love drawing different kinds of monsters. Here are some examples from last year. I decided to add the background in this year.


The first thing I start with is reading the book Where the Wild Things Are. The project is based on the illustrations, focusing on line, pattern and texture. When the students draw their monsters I expect them to use line, pattern and texture just like the book.
 Next, I show them how to draw the body of the monster using basic shapes. I also show them an easy way to draw arms, legs and claws. I have put a step-by-step example of how to draw a monster below. I do make sure to explain to the kids that this is about being creative and they do not have to draw their monster exactly like mine. The last step to drawing the monster is pattern and texture with lines and shapes.

Paint with water colors. I suggest bright colors to complement the crayon colors.

 Forest background. Using crayons I show the students how to draw the forest. We talk about the horizon line, the importance of overlapping, and that objects that are further back in space get smaller, object that are close are larger.
Paint with blues and greens.

Cut out the monster.

Paste to background.
 The kids really like this project and love drawing different kinds of monsters. Here are some examples from last year. I decided to add the background in this year.


Wednesday, April 7, 2010
2nd Grade - Print Houses
 Students were to design a house and yard using line, pattern and texture.
Materials:
9x12 white paper
pencil
black pen
Scratch-Foam Printing Plates
Print-making ink
Brayers
Ink tray
1. I gave the students some images of different houses and architecture for the students to draw from and use as inspiration. Student started with pencil drawings of their design.
2. They taped their drawings to a piece of Scratch-Foam and traced over the pencil with black pen and pressed hard as they worked. Using black pen gives me a finished second, pen and ink project.

3. Students lifted the drawing off of the foam and retraced the lines directly on the foam with pen.
4. Inking! Below are some images of how I set up my materials to get ready to print. I have the ink tray and brayer on the right and a piece of paper on the left. Because I did not have enough printing materials for each students. One table was for printing the other was for students to finish their work or free draw and wait for their turn. I show each student how to roll the ink on evenly and not put too much ink on their foam.


Subscribe to:
Posts (Atom)


